![]()
Disclaimer : This post is not finished and has NOT been fully reviewed.
If you’re doing CFD, chances are very high you’ll have at one point to make videos to present your work. A multitude of tools, with varying complexity, can be adopted to make them. In this post we’ll share some experience from the team members at COOP in completing this task.
FFmpeg
FFmpeg is a lightweight command line based tool which can be used to generate videos from a set of images. In addition, its use is possible across different operating systems which ensures portability of generated scripts (if you used any).
Tutorial on trapped vortex test case
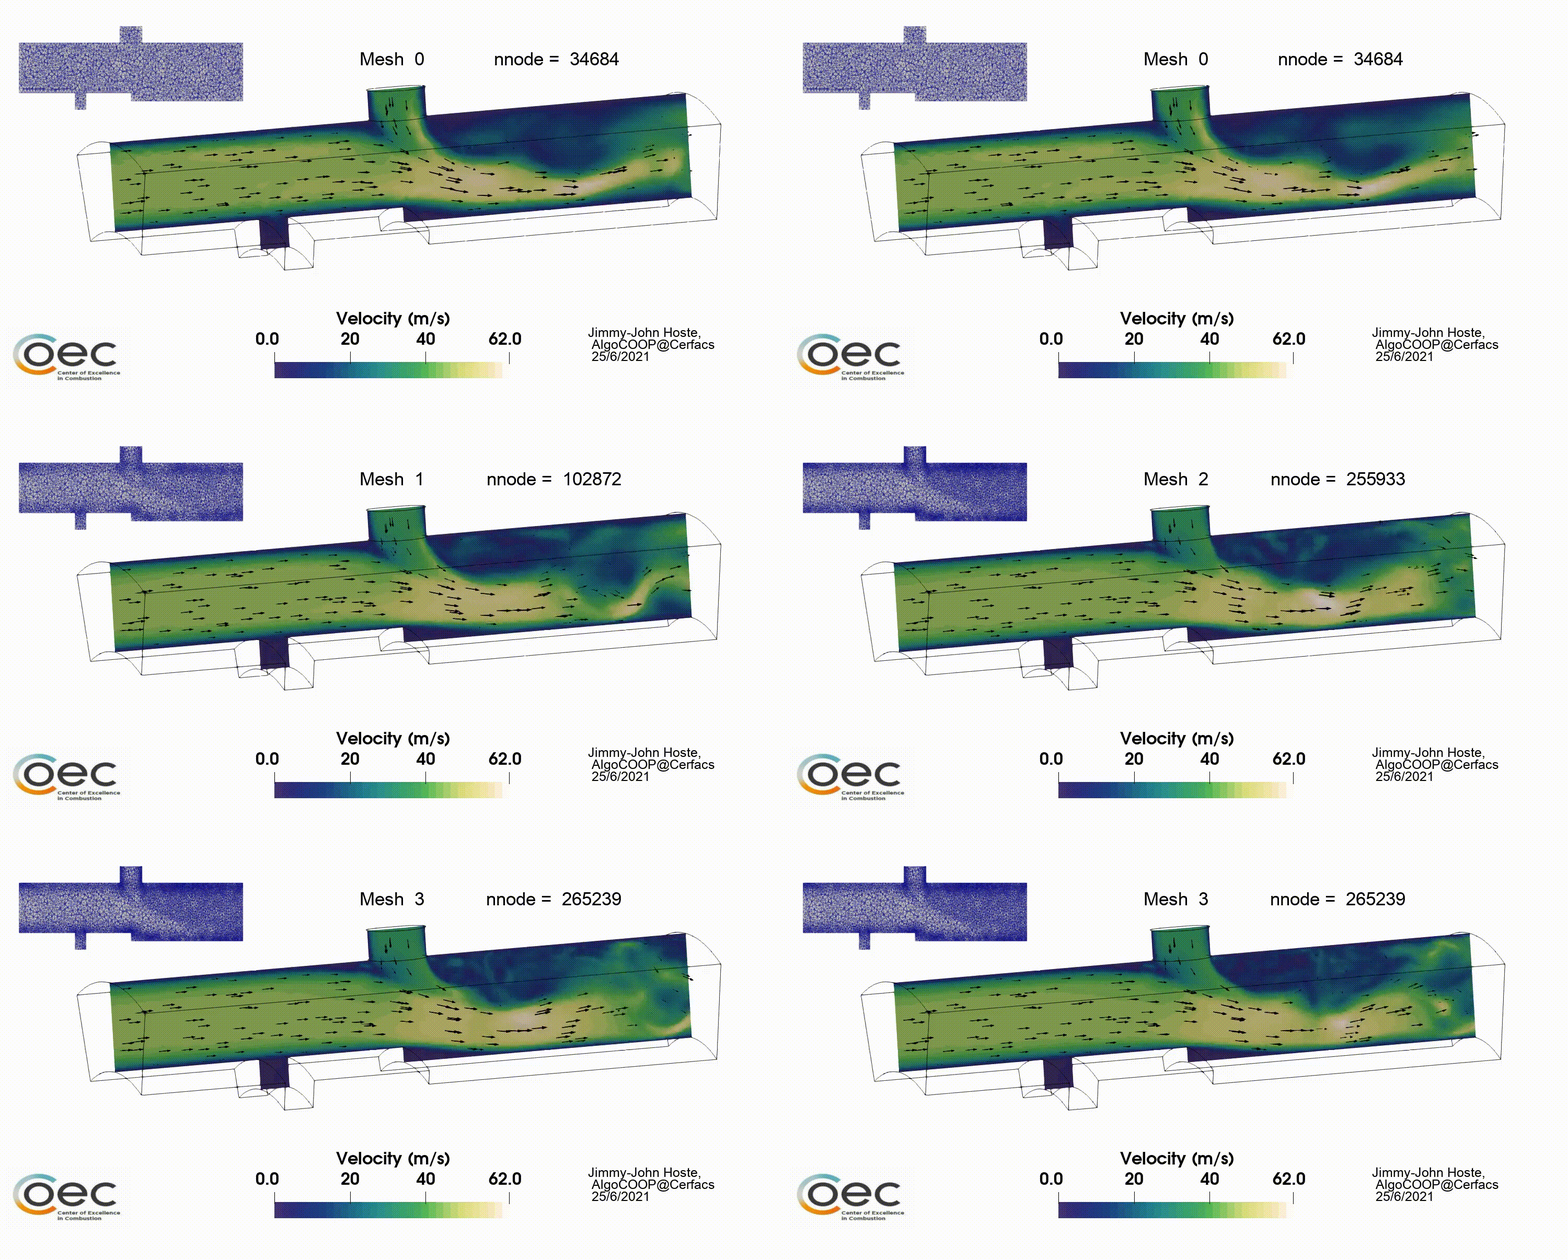
We’ll now detail the steps to generate the video associated with the gif animation below. It represents a consecutive set of CFD runs and refinement as explained here.

The reference material
A Python script is used to generate the animation.
The script and reference images can be found on the Tekigo repository. The Tutorial_FFmpeg folder structure is depicted below. It consists of 4 subdirectories containing the .png images from which to make a video. The images were extracted from paraview making use of the paraview-python utilities.
Each folder is associated with a CFD simulation on a different mesh. See this post for more information related to the simulation strategy which relies on Tekigo and Lemmings.
The final video can readily be obtained by running the tuto_get_video.py script which we’ll now further detail.
├── Plots_000
│   ├── mesh_crop.png
│   ├── solut_00000001.png
│   ├── solut_00000002.png
│   ├── ...
├── Plots_001
│   ├── mesh_crop.png
│   ├── solut_00000020.png
│   ├── solut_00000021.png
│   ├── ...
├── Plots_002
│   ├── mesh_crop.png
│   ├── solut_00000040.png
│   ├── solut_00000041.png
│   ├── ...
├── Plots_003
│   ├── mesh_crop.png
│   ├── solut_00000060.png
│   ├── solut_00000061.png
│   ├── ...
├── cleanFolder.sh
├── mesh_list.txt
└── tuto_get_video.py
The strategy
In this example, we opted to generate a video for each subfolder. The final video is then obtained by joining these individual videos. For each subfolder, the adopted strategy consists of a step by step addition of a new element. In summary,
- For each subfolder
- make video from solutions images
- overlay the mesh
- add text: mesh number, node number, author info
- Get a list of the individual videos
- Concatenate the videos into a single one
- (Optional) convert video to gif
Note that the intermediate videos are not removed as part of the current script.
The steps
The Python script consists of a set of consecutive FFmpeg calls through the subprocess module.
A few settings are specified and relate to the number of images from which to make a video as well as the desired frame rate
#----------Parameters to define--------#
num_frames = 20 # nb of saved pictures per folder
frame_rate = 10 # desired frame rate
author_name = '\n My name \n @Institution'
We’ll then loop through each subfolder Plots_XXX to generate intermediate videos.
desired_folders = sorted([s for s in os.listdir("./") if "Plots_" in s])
for ii, folder in enumerate(desired_folders):
Firstly, a video (tmp.mp4) based on the solut_*** images is generated. In order to ease the concatenation step at the end, a different command is performed whether we’re in the first subdirectory or another.
    if ii == 0 :
        subprocess.call("ffmpeg -r " + str(frame_rate)+ " -f image2 -s 1920x1080 \
                        -i solut_%08d.png \
                        -vcodec libx264 -crf 25 \
                        -pix_fmt yuv420p \
                        tmp.mp4", shell=True)
    else:
        subprocess.call("ffmpeg -r " + str(frame_rate)+ " -f image2 -s 1920x1080 \
                        -start_number "+str(num_frames*ii)  +"\
                        -i solut_%08d.png \
                        -vframes " +str(num_frames) +"\
                        -vcodec libx264 -crf 25 \
                        -pix_fmt yuv420p \
                        tmp.mp4", shell=True)
Subsequently, a scaled representation of the mesh file (mesh_crop.png) is overlayed through the -filter_complex functionality of FFmpeg.
    subprocess.call("ffmpeg -i tmp.mp4 -i mesh_crop.png \
                        -filter_complex \"[1:v] scale=480:240 [ovrl], [0:v][ovrl]overlay=10:10\"  \
                        output.mp4", shell=True)
Then, the mesh number text Mesh x is introduced with the drawtext feature of FFmpeg.
    subprocess.call("ffmpeg -i output.mp4 \
                        -vf \"drawtext=fontfile=Arial-Bold.ttf:text= \
                        'Mesh ' "+str(ii)+":fontcolor=black:fontsize=35:x=(w-tw)/2:y=100\" \
                        output_new.mp4", shell=True)
Additionaly, the node number and author name are added, yielding the final version of our individual videos named output_new_nnode.mp4. Note that mesh_info is a list with the number of nodes obtained by reading the mesh_list.txt file.
    subprocess.call("ffmpeg -i output_new.mp4 \
                    -vf \"[in]drawtext=fontsize=35:\
                                        fontcolor=black:\
                                        fontfile=Arial-Bold.ttf:\
                                        text='nnode = "+mesh_info[ii]+"':\
                                        x=(w-tw)*3/4:y=100, \
                            drawtext=fontsize=25:\
                                        fontcolor=black:\
                                        fontfile=Arial-Bold.ttf:\
                                        text='"+author_name+"':x=(w)*3/4:y=(h/2)+225[out]\" \
                    output_new_nnode.mp4", shell=True)
Finally, based on a list of the videos (video_list.txt) the concatenation step is performed.
subprocess.call("ffmpeg -f concat -safe 0 -i video_list.txt -c copy output.mp4", shell=True)
That’s it! Have a go and play around with the script to generate simple videos.
MoviePy
MoviePy is a neat open-source cross-platform Python library for video editing. It can be used for basic operations such as video speedup or adding an image-based watermark. Here, we will show two basic examples to help you getting started, but refer to the documentation for a more complete overview.
Speedup a video
import moviepy.editor as mp

original_clip = mp.VideoFileClip(video_name)
clip = original_clip.fx(mp.vfx.speedx, 2)

clip.write_videofile(new_video_name, codec="libx264")
Add an image-based watermark
import moviepy.editor as mp

original_clip = mp.VideoFileClip(video_name)

watermark = (mp.ImageClip(watermark_name)
             .resize(0.5)
             .set_duration(original_clip.duration)
             .set_pos(('right', 'bottom')))

clip = mp.CompositeVideoClip([original_clip, watermark])
clip.write_videofile(new_video_name, codec="libx264")
Notice we change the watermark size, control its duration (to match our original clip duration) and set the appearance position. Other operations such as rotate the watermark or set its opacity are also available (dir(watermark) to find out more).