Foreword
About HIP
hip is a package for manipulating unstructured computational grids developed by J. Mueller. It was born in 1997 at CERFACS in Toulouse to convert structured multi-block meshes into unstructured ones. (In the following, the terms mesh and grid will be used synonymously, and if not specified otherwise will always refer to the most general notion considered here which is a hybrid unstructured grid.) From that, hip grew into a toolkit that:
- reads meshes in various formats,
- generates simple rectangular 2D meshes,
- transforms meshes by translation, scaling rotation or reflection
- validates , the mesh
- removes certain mesh degeneracies,
- converts structured into unstructured grids, quadrilateral elements into triangular ones,
- extrudes 2D meshes axially and radially to 3D meshes,
- interpolates solutions between grids,
- cuts pieces of structured and unstructured meshes out,
- assembles meshes from pieces,
- coarsens unstructured grids for multi-grid applications,
- adaptively refines grids,
- and writes meshes in various formats.
HIP is a C mesh handler used at Cerfacs and University Queen Mary.
From HIP to PyHIP
As often, 90 percent of HIP usages were limited to 10% of its features, and diffusion/installation of executables was a recurrent chore. The PyHIP package is therefore a python wrapper for HIP, distributed from PyPI, with a standard Unix Command Line Interface for the most common actions.
Installation
Install PyHIP from PyPI in your terminal:
>pip install pyhip
Usage : Command line interface
Once installed, your terminal will feature the pyhipcommand:
>pyhip
Usage: pyhip [OPTIONS] COMMAND [ARGS]...

  ---------------  PYHIP  --------------------

  You are now using the Command line interface of PYHIP, a Python3 helper to
  interact with the mesh management tool HIP Pyhip was created at CERFACS
  (https://cerfacs.fr).

  This is a python package currently installed in your python environement.

Options:
  --help  Show this message and exit.

Commands:
  coarsen      Coarsen a mesh with isoFactor > 1
  convert      Convert a meshfile into specific format mesh
  generate2d   Generate 2d mesh
  generate3d   Generate 3d mesh
  geo          Generate .geo and .case file
  gui          Launch PyHIP IHM
  improve      Improve mesh using HIP algorithm
  info         Display mesh informations
  interactive  Launch bash hip.exe
  interpolate  Interpolate a source solution from a source mesh to a...
  meshid       Generate mesh ID Card
  refine       Refine a mesh with isoFactor < 1
  rotate       Rotate geometry of angle [deg] around axis
  scale        Scale geometry by scaling coefficients vector
  script       Excecute hip script in batch mode
  translate    Translate geometry by direction vector
  view         Quick mesh graphical view
Usual commands
Some commands are the usual simple action we do with hip: coarsen, refine, generate2d, generate3d, improve, rotate, scale, translate, interpolate, convert.
You can also start the interactive CLI of HIP with interactive, or re-use your hip scripts with script.
Additional features
The following features are exclusive to PyHIP:
guiis a graphical user interface to set up the basic actions of HIP using Opentea3.viewis an ultra simplified view of the mesh, helping to locate the different patches of the geometry. Requires Tk library.geogenerates a lightweight Ensight.geofile of the wireframe of the geometry.meshidgenerates a PDF standard ID card of the mesh, which can be useful to document your mesh in your directories.
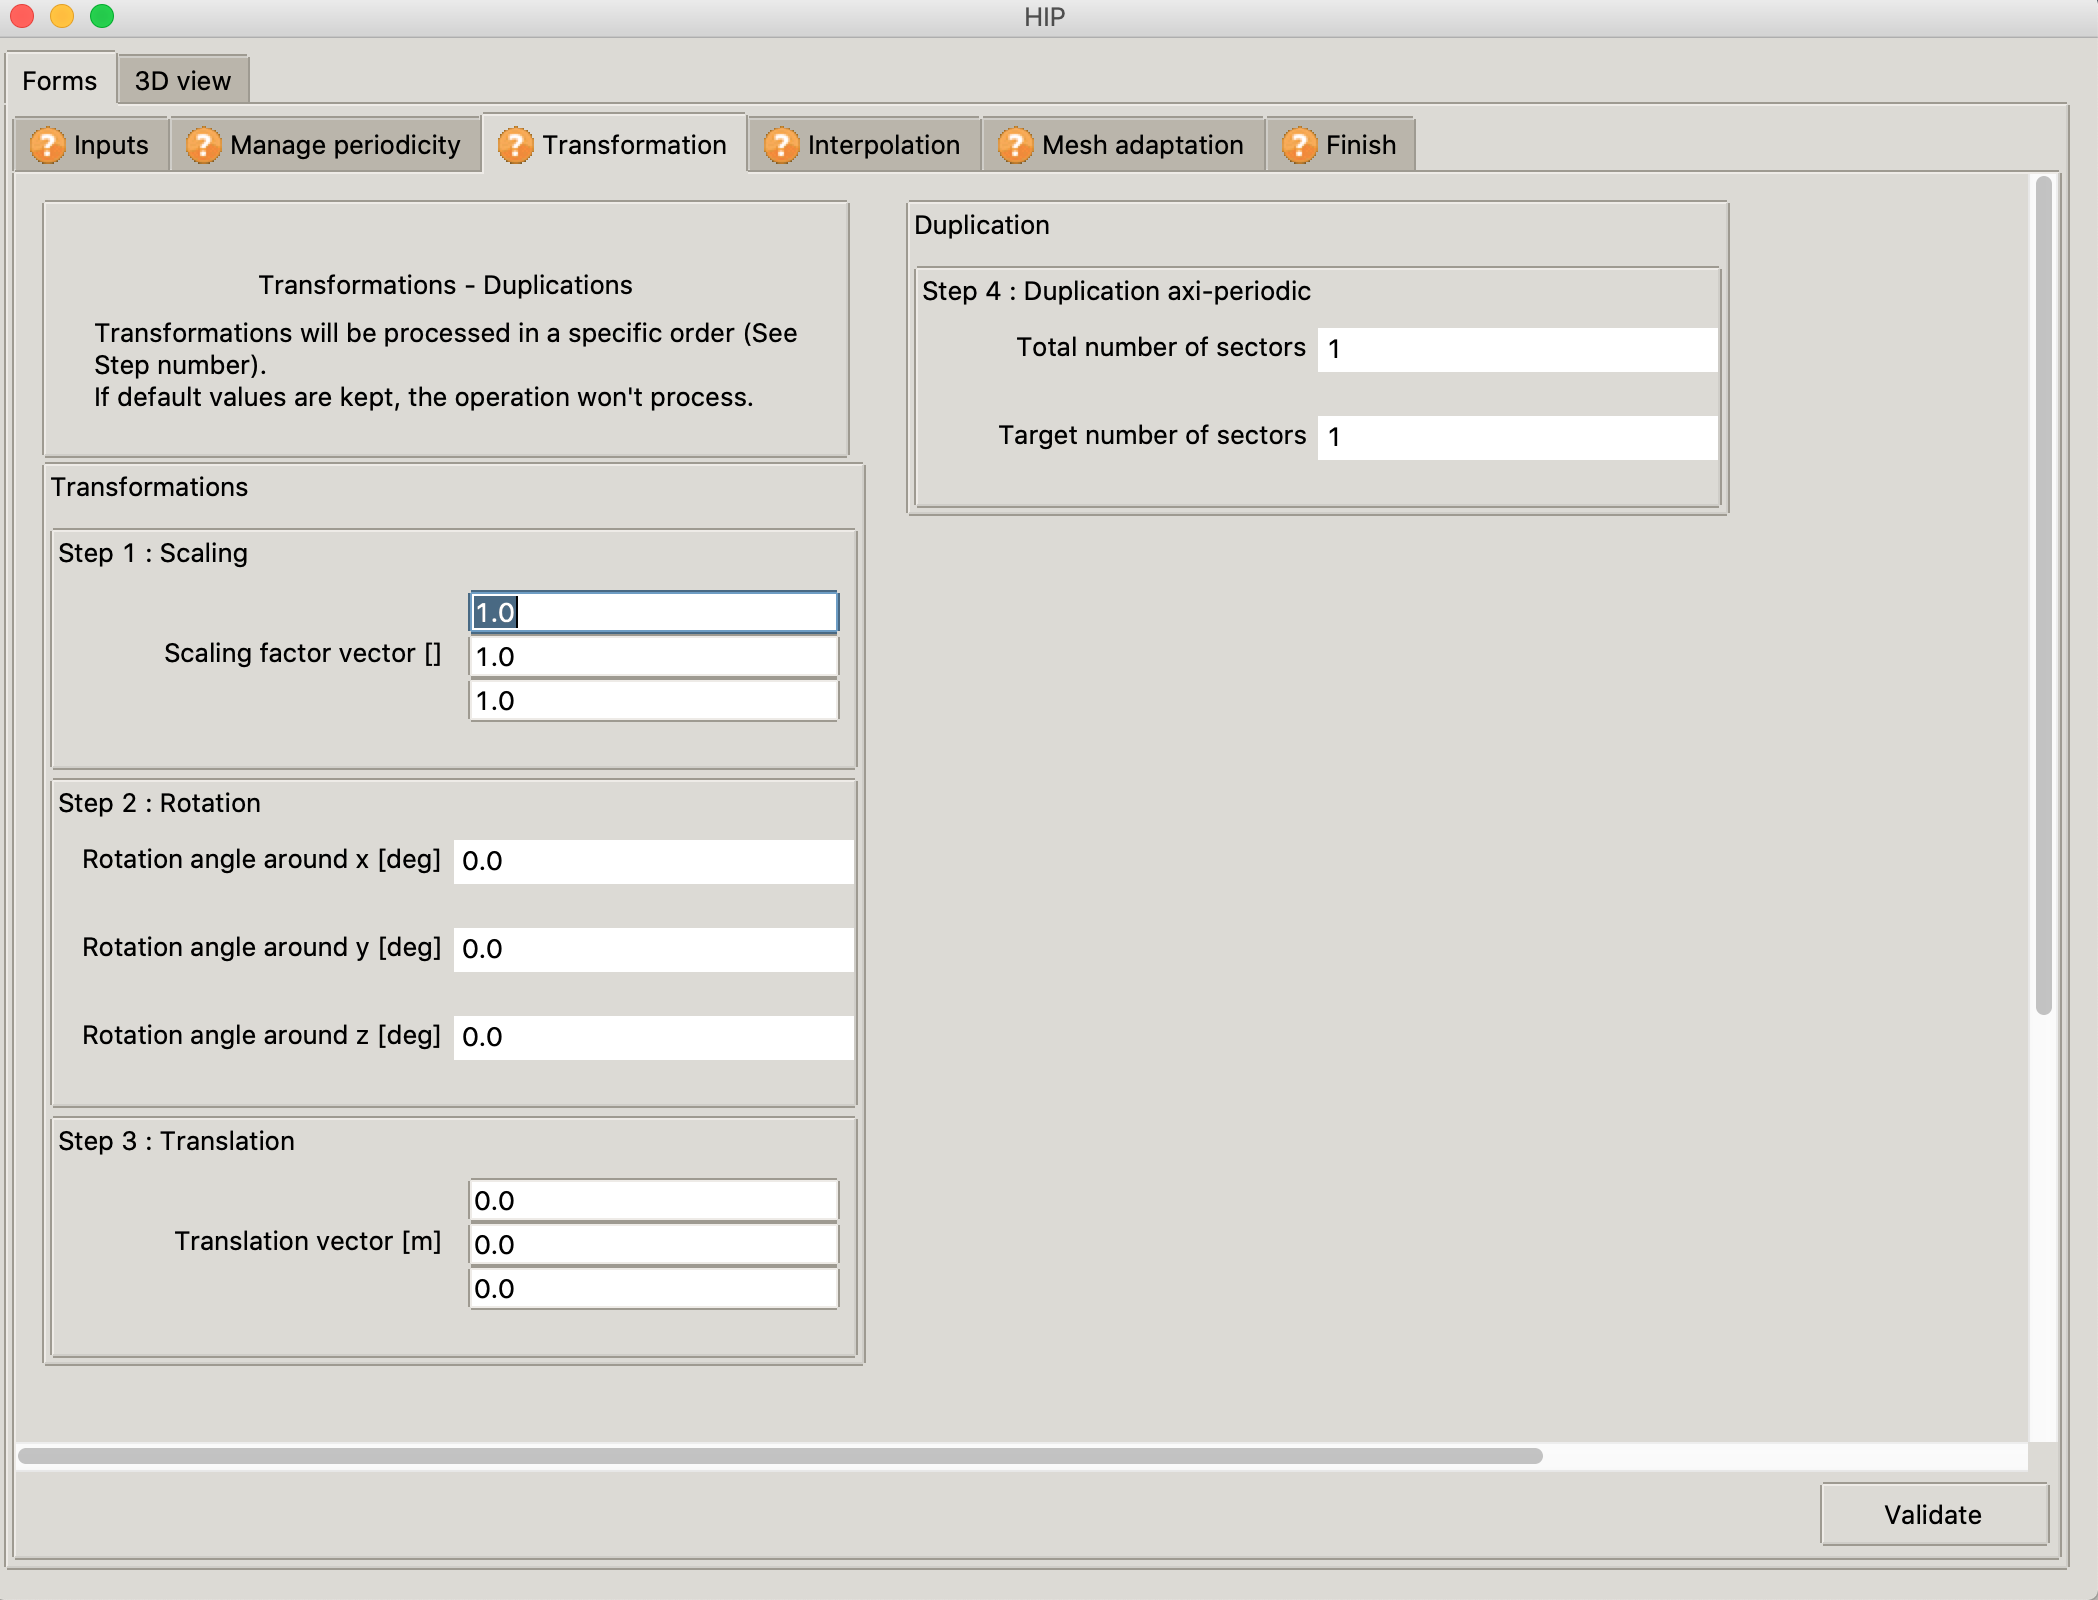
The PyHIP graphical user interface, base upon OpenTEA. Most of the features available though the command line can be prepared graphically.
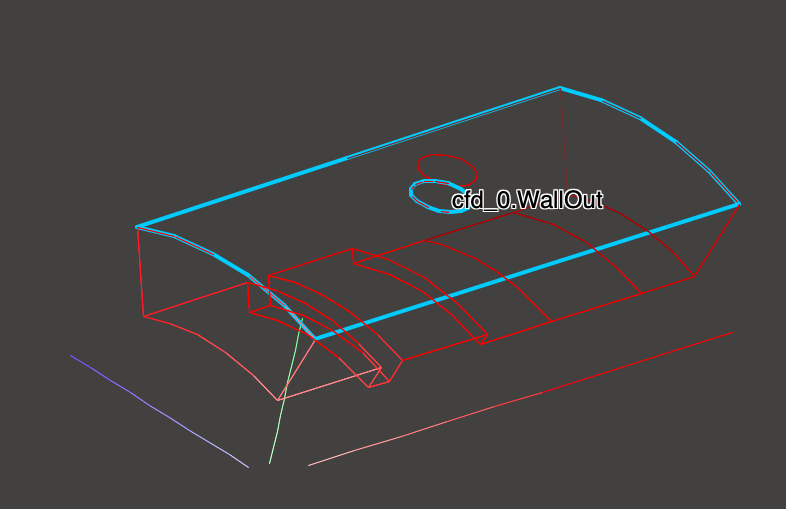
The view mode, to inspect the names of the patches on a geometry. The wireframe is also usable in Ensight or Paraview using the geo export option.
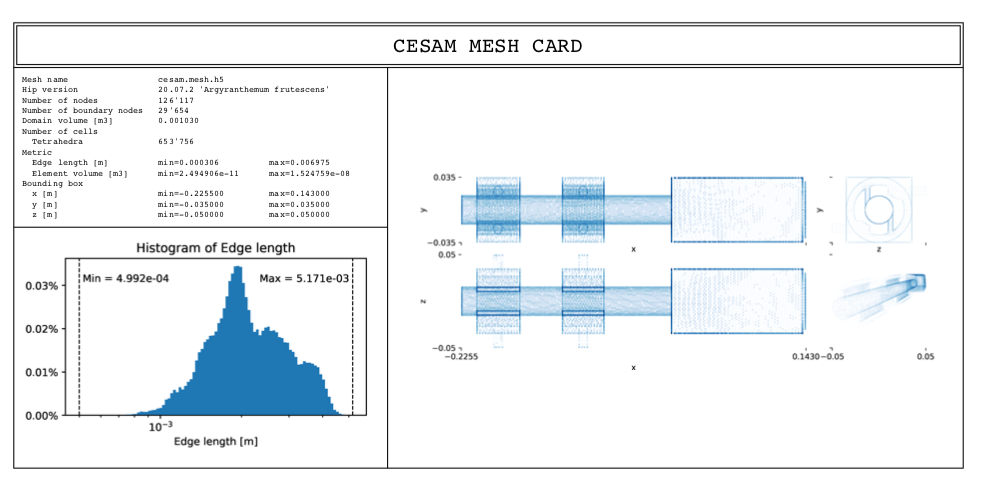
A typical ID card from PyHIP. This .pdf file is generated besides the mesh file .mesh.h5. This allows do “document” easily several versions of a similar configuration.
Usage: Python package
Yet another way to use pyhip is as a Python package. This may be useful if your workflow relies on Python scripts. The same tasks listed above can be accomplished within your script. To help you getting started, we will show how to create a simple mesh (and then make it slighter more complex), get mesh information, convert between mesh formats and coarse/refine your mesh.
Usual tasks
Create a simple mesh
Let’s start by creating an unit-length square with 9 elements in each direction:
from pyhip.commands.operations import generate_mesh_2d_3d
from pyhip.commands.operations import hip_exit
from pyhip.commands.writers import write_hdf5

lower_corner = (0., 0.)
upper_corner = (1., 1.)
resolution = (10, 10)
convert2tri = False
mesh_filename = 'square'

generate_mesh_2d_3d(lower_corner, upper_corner, resolution,
                    convert2tri=convert2tri)
write_hdf5(mesh_filename)

hip_exit()
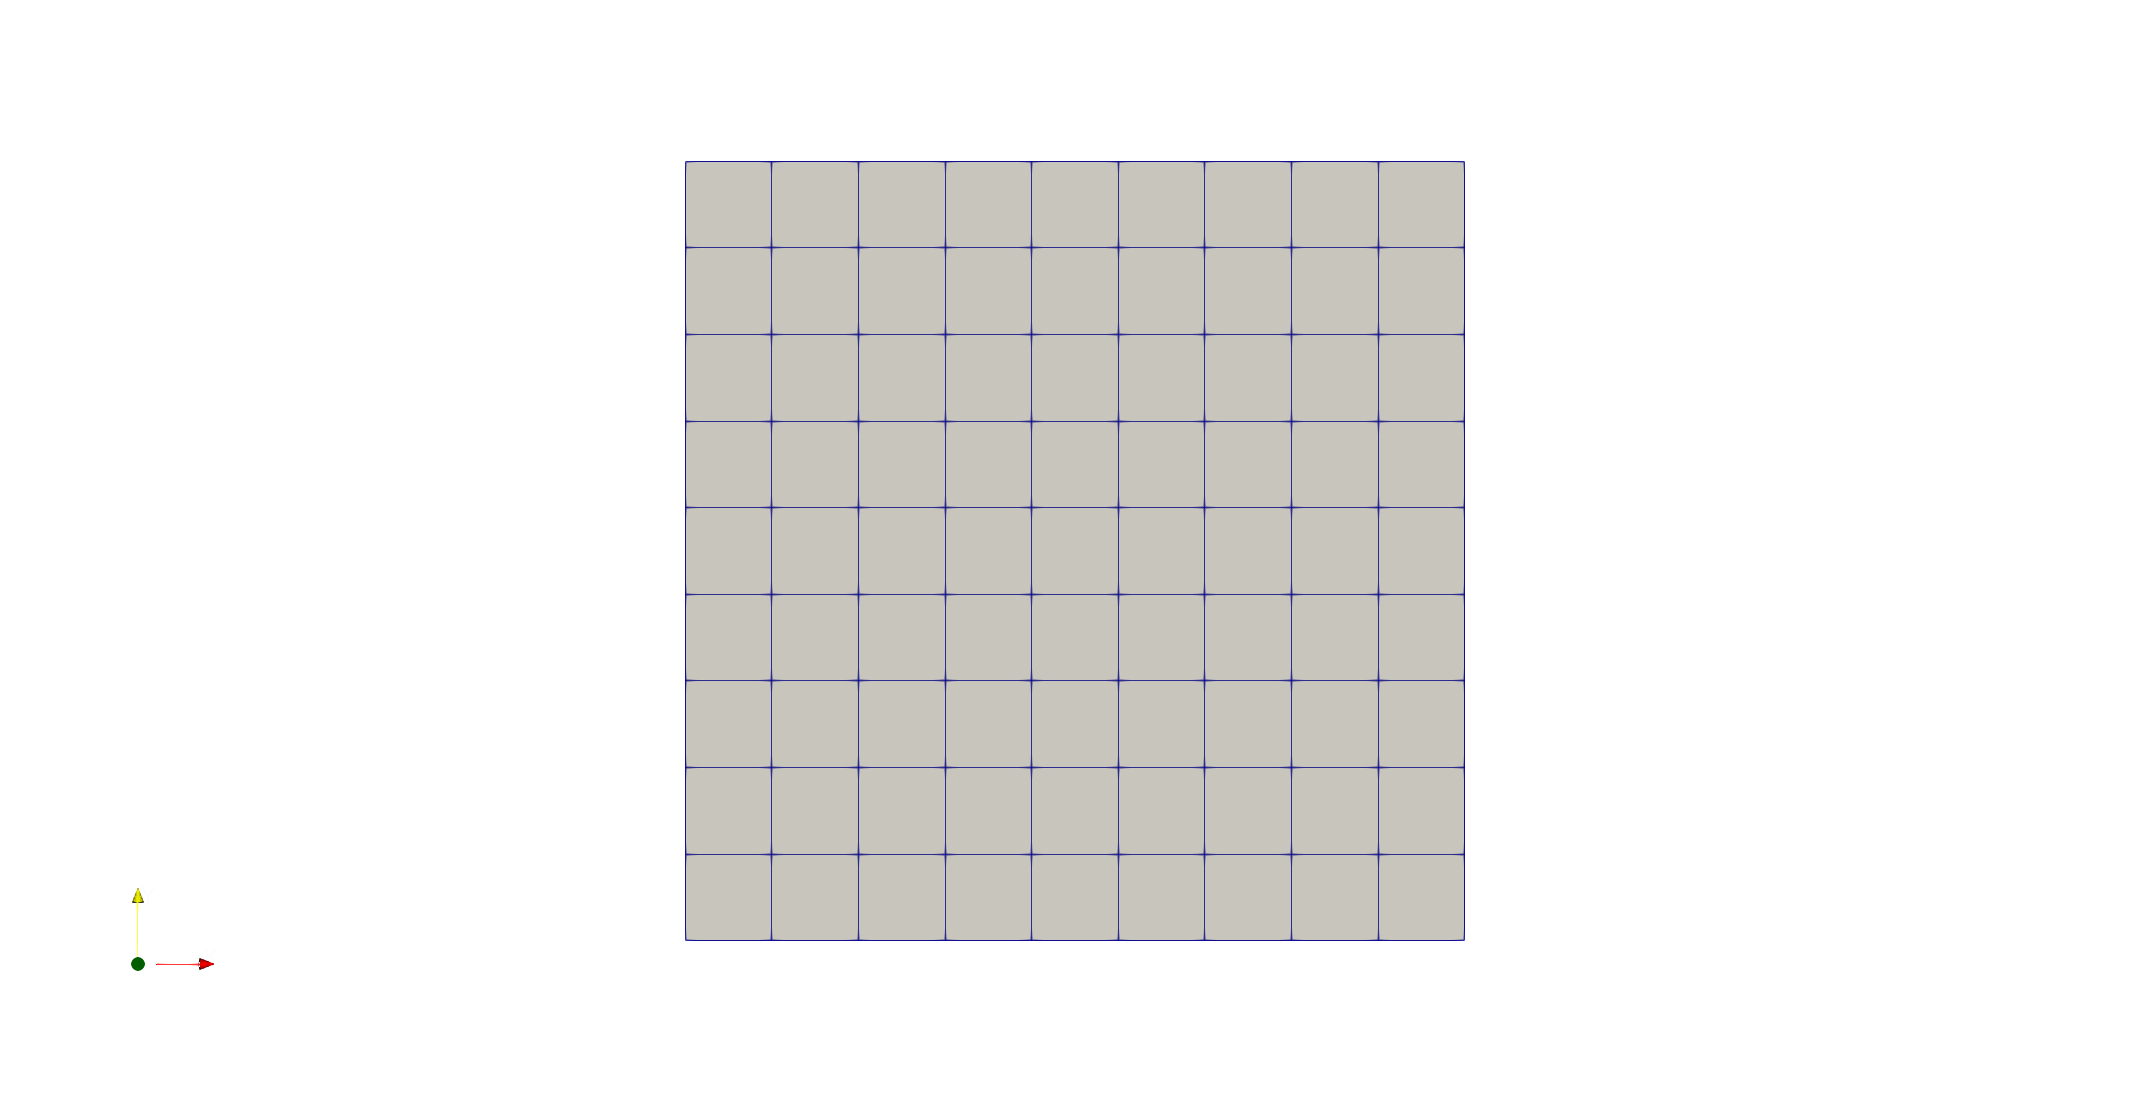
This code block generates a mesh with quadrilateral elements. To get a mesh with triangular elements instead, it is enough to change convert2tri = True. Notice resolution asks for the number of nodes in each direction, being the number of cells equal to \(n_{nodes} - 1\).
Extrude a 2-dimensional mesh
If instead, you want a 3-dimensional mesh, let’s assume a cube, you just have to specify the extrude axis, range and resolution:
lower_corner = (0., 0.)
upper_corner = (1., 1.)
resolution = (10, 10)
convert2tri = False
mesh_filename = 'cube'
extru_range = (0., 1.)
extru_axis = 'z'
extru_res = 10

generate_mesh_2d_3d(lower_corner, upper_corner, resolution,
                    convert2tri=convert2tri, extru_range=extru_range,
                    extru_axis=extru_axis, extru_res=extru_res)
write_hdf5(mesh_filename)

hip_exit()
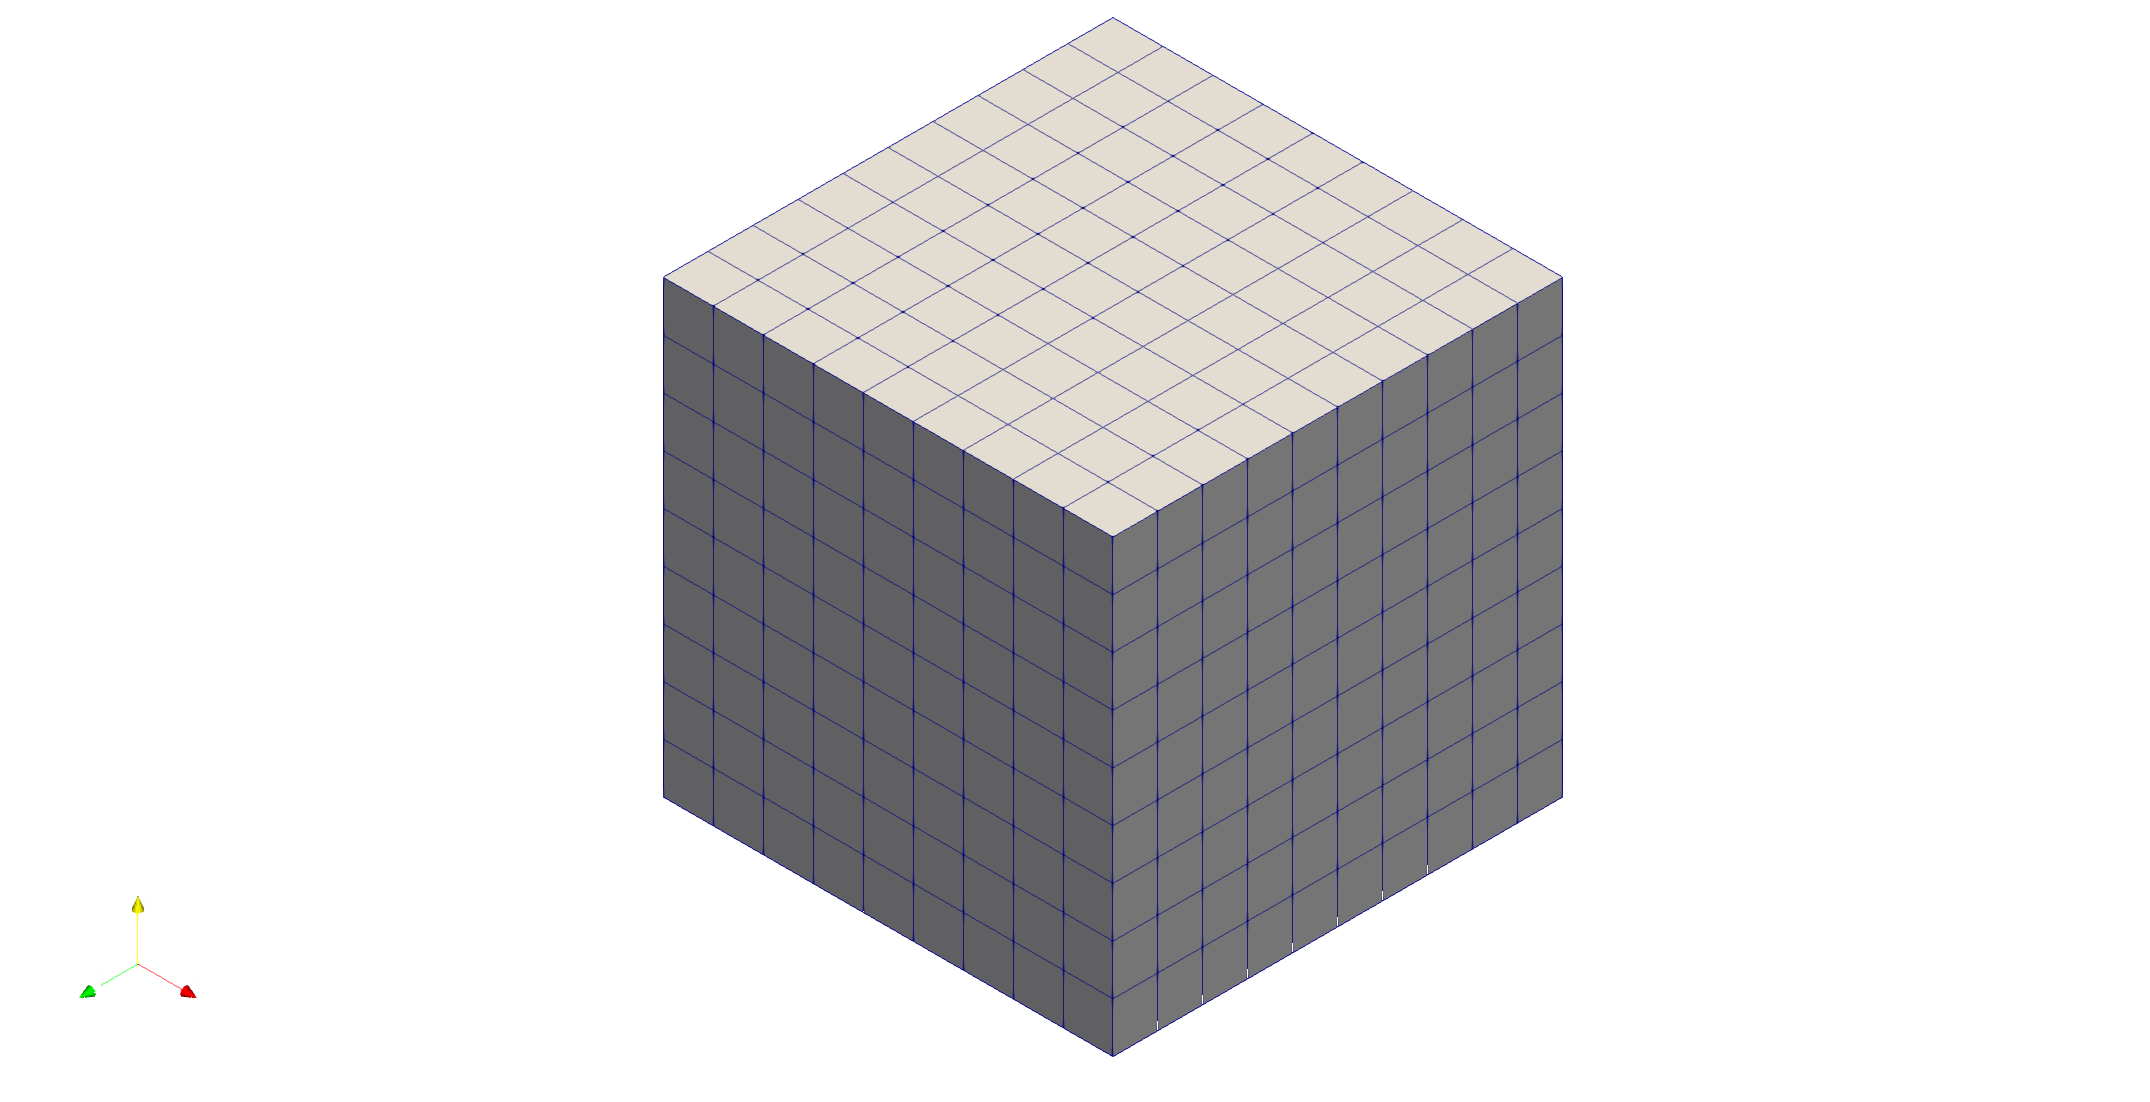
As in the 2-dimensional case, convert2tri controls the type of elements (hexahedral or tetrahedral).
More interestingly, you can create a cylinder using extru_axis = 'axi' and changing the range to extru_range = (0., 360.) (we also changed the resolution):

The other valid values for extru_axis are 'x' and 'y'.
Get mesh information
To get information about the mesh, we rely on extract_hdf_meshinfo.
from pyhip.commands.mesh_idcard import extract_hdf_meshinfo

mesh_filename = 'square.mesh.info'
mesh_info, is_axi, ndim, patch_labels = extract_hdf_meshinfo(mesh_filename)
mesh_info is a dict that contains useful information such as number of nodes, boundary nodes and cells, and mesh quality metrics (edge length and element volume extrema). is_axi and ndim inform about axisymmetry and number of dimensions, respectively. patch_labels provides the name of the patches.
If you have the mesh in a format other than hdf5, you can convert it, as it is shown next.
Mesh format conversion
A very useful feature provided by pyhip is the conversion between mesh formats. If the format you are looking for is not available, you can pipeline pyhip with meshio to create your own feature-rich converter (and everything is open-source!).
from pyhip.commands.readers import read_hdf5_mesh
from pyhip.commands.writers import write_gmsh

mesh_filename = 'square.mesh.h5'
new_mesh_filename = 'square'

read_hdf5_mesh(mesh_filename)
write_gmsh(new_mesh_filename)

hip_exit()
To have the code block above working between different mesh formats, you just have to use different readers and writers.
Mesh coarsening/refining
Finally, if you are performing convergence tests or simply playing with the impact of the mesh refinement in your simulations, then adapt_with_factor will be of great value to you.
from pyhip.commands.readers import read_hdf5_mesh
from pyhip.commands.writers import write_hdf5
from pyhip.commands.operations import adapt_with_factor
from pyhip.commands.operations import hip_exit

factor = 0.5
mesh_filename = 'square.mesh.h5'
new_mesh_filename = 'square_f{}'.format(str(factor).replace('.', ''))

read_hdf5_mesh(mesh_filename)
adapt_with_factor(factor)
write_hdf5(new_mesh_filename)

hip_exit()
This mesh adaptation works for triangular and tetrahedral elements only. A factor greater than 1 will coarse your mesh.
Closing remarks
Almost all the code blocks above make use of hip_exit. For now, this is the command responsible for the execution of all the commands the functions you call gather. You can also get a peek into the commands the functions are generating by looking to the list they return.
If you want to try out these examples with more complex meshes, please checkout out this repository.